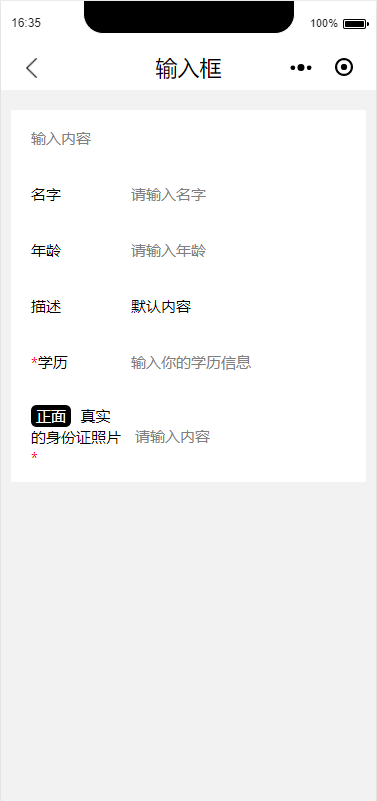
input-输入框
输入控件,它由input+cell基本组成使用指南

使用指南
在page.json中引入组件
{
    "usingComponents": {
      "el-input": "component/_input/input",
      "el-input-title": "component/_input/input-title"
    }
}
el-input属性(父)
| 名称 | 类型 | 默认 | 说明 | 版本 |
|---|---|---|---|---|
| title | String | "" | 输入框头部标题 | 0.0.2 |
| type | String | text | 输入类型 | 0.0.2 |
| name | String | "" | 关联form | 0.0.4 |
| mustchoose | Boolean | false | 是否出现必选符 | 0.0.2 |
| placeholder | String | "" | 预选 | 0.0.2 |
| value | String | "" | 值 | 0.0.2 |
| clear | Boolean | false | 擦除键 | 0.0.3 |
| focus | Boolean | false | 初始聚焦 | 0.0.4 |
| maxlenght | Number | 140 | 最大长度 | 0.0.4 |
| disabled | Boolean | false | 是否禁用 | 0.0.4 |
| vibrate | Boolean | false | 触摸反馈 | 0.0.4 |
| Internalstyle | Boolean | false | 摒弃控件样式 | 0.0.5 |
* title优先于el-input-title,当title属性存在时以title内容为准
value的合法值:
| 说明 | 版本 | |
|---|---|---|
| address | 地址选择器 | 0.0.4 |
| text | 文本输入键盘 | - |
| number | 数字输入键盘 | - |
| idcard | 身份证输入键盘 | - |
| digit | 带小数点数字键盘 | - |
el-input-title属性(子)
当标题需要自定义时,使用el-input-title标签中放置view
| 名称 | 类型 | 默认 | 说明 | 版本 |
|---|---|---|---|---|
| omit | Number | false | 省略,当填omit=‘1’时,表示省略1行,超出部分以...来表示。 | 0.0.2 |
| min | String | "" | 请带上单位 | 0.0.2 |
| max | String | "" | 请带上单位 | 0.0.2 |
方法
bindinput: function (e) {}
@e.detail
| 名称 | 说明 | 版本 |
|---|---|---|
| value | 值 | 0.0.2 |
插槽
尾部插槽:
| 名称 | 说明 | 版本 |
|---|---|---|
| right | 尾部插槽 | 0.0.2 |
使用
<el-input bindinput='onInput' title='名称'></el-input>

<el-input bindinput='onInput' value='' placeholder='清输入内容' data-e='value'>
    <el-input-title omit='true'>
        自定义内容
    </el-input-itile>
</el-input>
Page({
    data: {
        value: ''
    },

    /**
    * 通用的input事件(1)
    */
    onInput(e) {
      this.setData({
        [e.target.dataset.e]: e.detail.value
      })
    },
})
(1)通用事件
依赖
| 名称 | 版本 |
|---|---|
| address | 0.0.4 |